7 Tips for Choosing a Prehung Exterior Door

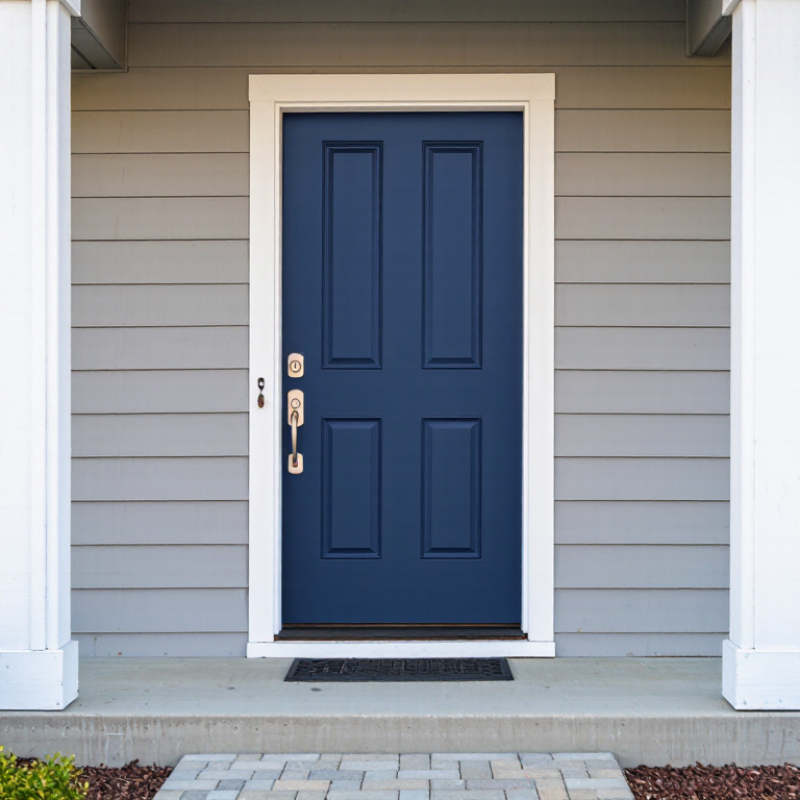
Choosing the right prehung exterior door is more than selecting a style from a showroom wall. The unit includes the door slab, frame, hinges, and often the threshold, so each part must work together. A beautiful door can still cause trouble if the rough opening is too tight, the sill sits unevenly, or the swing direction is wrong. Measure carefully. Small errors become expensive after delivery.

This guide explains seven practical checks for a confident purchase. You will consider rough-opening dimensions, handing, frame material, weather resistance, security features, energy performance, and installation details. Look closely at the threshold and weatherstripping. They should meet evenly, without visible gaps or crushed seals. A solid core may feel reassuring, but weight can affect hinges and installation effort. That detail is easy to overlook.

Real projects rarely behave perfectly. Walls can be slightly out of square, and older homes often hide uneven floors. I have seen a door appear correctly sized until the trim was removed. That experience supports a careful site inspection before ordering. Manufacturer specifications remain essential, especially for fire ratings, water exposure, glass options, and warranty conditions. Local building requirements may also affect the final choice.

Do not judge only by appearance. Compare performance, maintenance needs, and installation complexity. With accurate measurements and realistic expectations, your prehung exterior door can improve comfort, security, and curb appeal for years. Mistakes happen. Thoughtful checking makes them less costly.
7 Tips for Choosing a Prehung Exterior Door

Evaluate Climate Exposure with NFRC U-Factor and SHGC Ratings

7 Tips for Choosing a Prehung Exterior Door

Tip 1: Study the NFRC label before choosing a prehung exterior door. U-factor measures how quickly heat passes through the door assembly. Lower U-factor values usually improve insulation, especially in cold climates. I have found that a small rating difference can affect comfort near the entryway. Check the entire assembly, not only the door slab.

Tip 2: Match the SHGC rating to your local sun exposure. A higher SHGC can collect useful winter sunlight in colder regions. It may also increase summer heat near a south- or west-facing entrance. Lower SHGC values often suit hot, sunny locations. Stand near the proposed doorway at different times. Your home may receive more direct sun than expected.

Tip 3: Consider glass size, porch shade, and seasonal weather together. A shaded entrance can tolerate different performance needs than an exposed doorway. Look for condensation risks in humid or sharply changing climates. The NFRC rating is valuable, but installation still matters. Poor shimming or damaged weatherstripping can weaken a well-rated door.

Tip 4: Compare ratings under similar conditions. Some choices look efficient on paper. They may feel less comfortable after installation. Ask a qualified installer about local requirements and wall orientation. I once underestimated afternoon glare during a renovation, so I now inspect the doorway before ordering. That extra check prevents an expensive mistake.

Measure the Rough Opening Within Manufacturer Tolerance Limits

A prehung exterior door can look perfectly sized and still fail at the opening. Measure the rough opening at the top, center, and bottom. Record the smallest width. Check height at both jambs, then measure both diagonals for square.

Common installation guidance allows roughly 2 inches of extra width and 2 to 2½ inches of extra height. However, manufacturer tolerance limits differ. Follow the installation sheet, not a convenient rule of thumb. The U.S. Department of Energy’s Building America guidance identifies uncontrolled air leakage as a major source of envelope energy loss. A poor opening fit can make that problem worse.

Use a long level to check each side. The sill must be flat, solid, and free from debris. A ⅛-inch error may seem minor, but it can affect latch alignment and weatherstripping contact. The 2020 Residential Energy Consumption Survey from the U.S. Energy Information Administration reports that space heating represented about 42% of household energy use. That figure is not caused by doors alone, but it shows why small envelope gaps deserve attention.

I measure twice, then inspect the framing again. Sometimes the opening is twisted, not undersized. That mistake is easy to miss. If the rough opening falls outside stated tolerances, correct the framing before installation. Shims can adjust position, but they should not compensate for a badly built opening. Check the sill after temporary placement, because the floor may not be level.

Compare Door Materials Using NAFS Performance Grade Standards

7 Tips for Choosing a Prehung Exterior Door

Compare door materials through NAFS Performance Grade (PG) standards, not appearance alone. NAFS evaluates the complete unit, including the slab, frame, hinges, hardware, glazing, and weather seals. A higher PG generally indicates stronger resistance to wind, water, and air pressure. Check the tested PG and Design Pressure on the certification label. Do not accept vague claims such as “heavy duty.”

Fiberglass usually resists moisture and surface damage well. Insulated steel can provide strong security and stable thermal performance, but exposed edges may rust if neglected. Wood offers authentic detail and repairability, yet it demands careful sealing. Composite materials can reduce swelling, although performance varies by construction. Compare each material only after confirming the same NAFS class and size.

Look for these seven details: certified PG rating, tested dimensions, water resistance, air leakage results, thermal information, threshold design, and installation instructions. NAFS classes include R, LC, CW, and AW, with different performance expectations. Residential replacements often use R or LC ratings, but local exposure matters. Coastal wind requires tougher evidence. Ask for test reports.

The U.S. Department of Energy reports that windows account for 25%–30% of residential heating and cooling energy use. Doors form part of that envelope. A poorly adjusted threshold can defeat good materials. I once focused too heavily on the slab and overlooked the frame connection. That was a mistake. Also inspect the sill after rain, not only inside a showroom.

Choose Security Hardware Meeting ANSI/BHMA Grades 1–3

7 Tips for Choosing a Prehung Exterior Door

Tip 1: Start with the lock grade, not the finish. ANSI/BHMA grades measure durability, cycle testing, and security performance. Grade 1 offers the highest level. Grade 3 is typically the basic residential level. Tip 2: Match the hardware to your risk. The FBI’s 2023 Crime Data Explorer recorded more than 800,000 burglary offenses in the United States. That figure supports careful planning, but it does not predict your neighborhood’s risk. Tip 3: Choose a deadbolt tested under ANSI/BHMA A156.5, then verify the package clearly states its grade.

Tip 4: Inspect the strike area before installation. A strong lock can fail when the frame flexes or the screws are too short. Use a reinforced strike and screws that reach the wall framing. Tip 5: Check the prehung unit for square alignment. Measure both diagonals. Unequal measurements can cause binding and incomplete latch engagement. Tip 6: Confirm the door’s handing, threshold height, and weather seal before ordering. Small errors become expensive after delivery. Tip 7: Keep the key cylinder protected from direct weather. I have seen well-rated hardware corrode because the overhang was too shallow. That was an avoidable mistake.

Security ratings are only one part of performance. The National Institute of Standards and Technology emphasizes that installation conditions affect building-component performance. Recheck the latch after seasonal movement. A Grade 1 lock installed poorly is still a weak point. Grade 3 hardware may be reasonable for a low-risk location, but that choice deserves honest reflection.

7 Tips for Choosing a Prehung Exterior Door - Choose Security Hardware Meeting ANSI/BHMA Grades 1–3

Tip What to Check Recommended Specification or Measure Why It Matters
1. Confirm the rough opening Measure the opening width, height, and wall depth after removing interior trim where practical. Compare the measured opening with the manufacturer’s required rough-opening dimensions. A common nominal 3-0 × 6-8 door uses a door slab approximately 36 × 80 inches, but the complete prehung unit is larger. Correct measurements help prevent difficult installation, excessive shimming, and gaps that can reduce weather and security performance.
2. Select the correct handing and swing Determine whether the door should be left-hand or right-hand, and whether it swings inward or outward. Stand outside facing the door: hinges on the left generally indicate left-hand handing; hinges on the right generally indicate right-hand handing. Verify the supplier’s definition before ordering. The wrong handing can interfere with walls, stairs, furniture, porches, and the intended path of travel.
3. Match the door to the climate Review material, weather resistance, glazing, threshold design, and energy-performance information. Look for a durable exterior finish, a compression weatherstrip, an adjustable or properly sealed threshold, and performance ratings appropriate for the local climate. Where applicable, compare U-factor and solar heat gain coefficient values. A suitable assembly limits air and water infiltration while improving comfort and reducing heat transfer.
4. Choose security hardware by ANSI/BHMA grade Check the product documentation for the applicable ANSI/BHMA standard and grade for the lock or deadbolt. Grade 1: highest level of performance in the three-grade system.
Grade 2: intermediate level, commonly used in residential applications.
Grade 3: basic level within the system.
Verify whether the rating applies to a deadbolt, bored lock, mortise lock, or another hardware category.
ANSI/BHMA grades provide a standardized performance classification, but the grade alone does not guarantee resistance to every type of forced entry.
5. Prioritize the deadbolt and strike installation Inspect deadbolt type, bolt length, strike plate, fasteners, and the condition of the surrounding frame. Use a deadbolt tested to the applicable ANSI/BHMA standard, install the supplied strike correctly, and fasten the strike into sound framing with appropriately sized screws as permitted by the installation instructions. A strong lock can perform poorly when the strike, screws, jamb, or wall framing is weak or improperly aligned.
6. Evaluate glazing and visibility Consider the size, location, and construction of glass panels, sidelites, and decorative inserts. For security-sensitive locations, choose impact-resistant or laminated glazing where suitable and keep lock-reach distances in mind. Confirm local code requirements for safety glazing. Glass affects daylight, privacy, energy performance, and potential access to interior hardware.
7. Verify installation and code details Review sill height, egress, accessibility, fire-rating needs, local wind requirements, and the manufacturer’s installation instructions. Confirm required clearances, latch and deadbolt alignment, continuous weather sealing, and proper shimming. Use a listed fire-rated assembly only where the complete assembly is required and approved for that application. Correct installation is essential for reliable operation, weather protection, safety, and preservation of the door and hardware ratings.
Selection note: ANSI/BHMA Grade 1, Grade 2, and Grade 3 are performance classifications. Always confirm the exact standard and hardware category listed for the product, because grades and test requirements can differ among lock and hardware types.

Verify Installation, Flashing, Warranty, and ENERGY STAR Requirements

7 Tips for Choosing a Prehung Exterior Door

Verify the installation plan before comparing finishes. Confirm the rough opening, wall thickness, swing direction, and threshold height. Measure twice. A prehung unit can still fail when the opening is uneven. Ask whether the installer will level the sill, fasten the jambs, and check the door’s reveal. These small details affect operation, air leakage, and security.

Tip 1: Request a clear flashing plan. The sill should shed water outward, while jamb and head flashing should connect with the wall’s water-resistive barrier. Sealant alone is not a complete drainage system. Tip 2: Read the warranty before purchase. Check coverage for the slab, frame, glass, hardware, finish, labor, and water damage. Some exclusions are easy to miss. Keep installation records and photographs.

Tip 3: Verify current ENERGY STAR requirements for your climate zone. Look for certified performance data, suitable U-factor, and low air leakage ratings. Glass area and door color may affect performance. Ask for the product’s certification details, not only a sales claim. An efficient door cannot correct poor weatherstripping or careless installation. One practical concern deserves attention: even a qualified installer may overlook the sill pan during rushed work. Inspect that area before interior trim hides it.

7 Tips for Choosing a Prehung Exterior Door

Use the chart to compare common nominal exterior door sizes, then verify installation details, flashing, warranty coverage, and applicable ENERGY STAR requirements before purchasing.

1. Verify the opening: Measure the rough opening, jamb depth, swing direction, threshold height, and finished-floor clearance.
2. Confirm installation: Check that the frame is plumb, level, square, and securely fastened to structural framing.
3. Review flashing: Use a sill pan or equivalent sill protection and integrate head and jamb flashing with the wall drainage plane.
4. Check water management: Confirm that the threshold and surrounding wall assembly direct water away from the interior.
5. Compare insulation: Review the product’s U-factor, air leakage, and any applicable solar heat gain information.
6. Verify ENERGY STAR eligibility: Requirements vary by product type and climate zone, so use the current regional criteria and certification label.
7. Read the warranty: Check coverage periods, finish limitations, installation requirements, glass exclusions, and maintenance obligations.

Dimensions shown are common nominal exterior-door sizes in inches; actual unit dimensions and rough-opening requirements vary by manufacturer and installation system.